
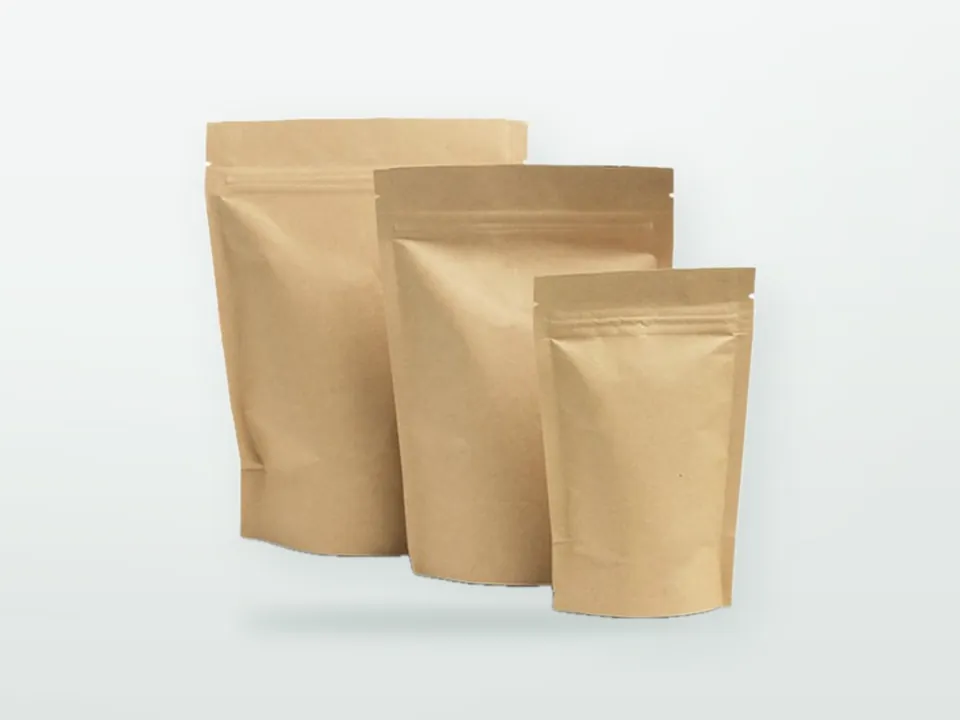

Flexible pouches are made by printing a film, bonding it to one or two other webs, leaving the laminate to cure, slitting it to width and only then converting it into individual pouches on a separate machine. That route explains two things buyers notice in a quotation: cylinders, lamination, curing, slitting and pouch making appear as separate lines, and delivery can sit a week or more after the print date even when every machine is free. This guide follows that route from the first film reel to a packed carton or reel of roll stock, with the process parameters, tests and defects that matter to packaging engineers, QA managers and buyers.
It is one of our production process guides. The product side (which structure, format and features to choose) is covered on our custom printed stand-up pouches page and its supporting articles. 9 Packaging is an Istanbul-based B2B manufacturer and exporter of custom printed packaging; this page describes how the flexible packaging industry generally works, not the equipment of any one plant.
How are pouches made? The process in seven stages
Flexible pouches are made in seven main stages: films are sourced and checked, artwork is turned into cylinders or plates, the outer film is printed (usually reverse printed), the printed film is laminated to barrier and sealant layers, the laminate cures, it is slit into narrower reels, and those reels are converted into pouches on a pouch making machine before inspection and packing. Roll stock for form-fill-seal lines stops after slitting.
Process line (pre-made pouches):
- Film reels
- incoming inspection
- prepress and cylinders/plates
- printing
- lamination (1 or 2 passes)
- curing
- slitting
- pouch making (sealing, gusset, zipper, valve, notches, cutting)
- inspection and testing
- counted packing
Process line (roll stock):
- Film reels
- incoming inspection
- prepress
- printing
- lamination
- curing
- slitting and rewinding to customer reel spec
- inspection
- reel packing
| Stage | What happens | Main machine type | Typical duration driver |
|---|---|---|---|
| 1. Materials | Print film, barrier film or foil, sealant film, inks and adhesives received and checked | Laboratory and incoming QC | Availability of special films (barrier, mono-material) |
| 2. Prepress | Colour separation, distortion, step-and-repeat, cylinder engraving or plate making | Repro studio, engraving or plate-making line | Proof approval; cylinder engraving queue |
| 3. Printing | Reverse or surface printing of the outer web | Rotogravure press, CI flexo press or roll-fed digital press | Colours, run length, make-ready |
| 4. Lamination | Printed web bonded to further webs | Solventless, solvent-based or extrusion laminator | Number of passes |
| 5. Curing | Adhesive reacts to full bond strength and low residuals | Temperature-controlled cure room | Adhesive system; typically days, not hours |
| 6. Slitting | Wide laminate cut into reels at pouch or FFS width | Slitter-rewinder | Number of lanes, reel specs |
| 7. Pouch making | Pouches formed, sealed, fitted with features and cut | Pouch making machine (three-side-seal/stand-up, side-gusset or flat-bottom type) | Format complexity; features |
The sections below go through each stage in order. Terms used here are defined in our converting and manufacturing glossary and packaging materials glossary.
Which films and materials go into a pouch laminate?
A pouch laminate (Verbundfolie in German) typically combines an outer print film, an optional barrier layer and an inner sealant film. The outer film gives print surface, gloss and heat resistance; the barrier layer controls oxygen, moisture and light; the sealant forms the seals and is the food-contact surface. Which combination suits a product is covered in pouch laminate structures and barrier properties; here the focus is how each material behaves in production.
| Material | Role | Typical gauge (indicative) | Production behaviour that matters |
|---|---|---|---|
| PET (biaxially oriented polyester) | Outer print film | Often 12 µm | Dimensionally stable, high heat resistance, so it tolerates hot sealing jaws; reverse printed |
| BOPP (biaxially oriented polypropylene) | Outer print film; mono-PP outer | Typically 15-30 µm, often 18-20 µm | Lower heat resistance than PET; needs corona treatment for ink and adhesive adhesion |
| OPA / BOPA (oriented polyamide, nylon) | Puncture and flex resistance, some oxygen barrier | Typically 12-15 µm | Absorbs moisture from the air; must stay wrapped until use or it curls and laminates poorly |
| PE sealant (LDPE/LLDPE blends, often metallocene grades) | Sealing layer, toughness, food contact | Typically 40-150 µm depending on pouch size and fill weight | Slip and anti-block additives control friction; corona-treated on the laminating side only |
| CPP (cast polypropylene) | Sealant for mono-PP and higher-temperature uses | Typically 25-80 µm | Higher seal initiation temperature than PE; can be brittle in the cold |
| Metallised films (metPET, metBOPP) | Light, oxygen and moisture barrier | Base film gauge; aluminium layer a few tens of nanometres | Barrier depends on optical density and metal adhesion; metal can crack if over-stretched |
| AlOx or SiOx-coated films | Transparent barrier | Base film gauge; coating in the nanometre range | Coating cracks under excessive tension or flexing; often supplied with a protective top coat |
| Aluminium foil | Very high barrier, total light barrier | Typically 7-9 µm in pouches | Pinholes at thin gauges; wrinkles easily; needs careful tension control |
| Kraft paper | Outer layer for a paper look | Typically 40-80 g/m² | Surface printed; moisture content affects curl and lamination |
| MDO-PE or BOPE | Outer print film for mono-PE | Typically 20-30 µm | Lower heat resistance and more stretch than PET; harder to print in register |
| Coextruded PE with EVOH | Barrier sealant for mono-PE | Sealant gauge; EVOH a thin internal layer | EVOH barrier drops at high humidity; share kept low for recyclability |
Incoming inspection
Converters typically check every incoming lot against the purchase specification before it is released to production:
- Gauge (thickness) and yield, because a thinner film changes stiffness, barrier and the pouch count per kilogram.
- Surface treatment level on the treated side, measured as wetting tension (dyne level, ISO 8296) with test inks or contact-angle methods. Treatment decays with storage time, so old film may need re-treating or may laminate poorly.
- Coefficient of friction (COF) on the sealant face, because slip affects how pouches run on filling machines.
- Optical density of metallised films, and certificate values for OTR and WVTR on barrier films.
- Visual defects: gels, die lines, wrinkles, telescoped or damaged reels, splices.
- Documents: certificates of analysis per lot, and food-contact Declarations of Compliance for plastic films, adhesives and inks, so the converter can build the declaration for the finished pouch.
Hygroscopic materials (OPA, paper) are usually conditioned in the production hall in their wrapping before use. Films stored cold are brought to room temperature before unwrapping, otherwise condensation forms on the reel.
Prepress and tooling: cylinders, plates and proofs
Prepress turns approved artwork into the image carriers for the chosen print process: engraved cylinders for gravure, photopolymer plates for flexo, or a print-ready file for digital. It also adapts the design to the film: mirror imaging for reverse print, a white underprint layer, trapping, distortion and the repeat length that fits the pouch size.
Steps that matter for pouches:
- Repeat and step-and-repeat. The pouch layout (front, back and gusset, or several pouches across the web) is arranged so the print repeat matches the cylinder circumference or plate sleeve. For roll stock, the repeat must equal the cut-off length on the customer's form-fill-seal machine, with an eye mark (photocell mark) in a defined position.
- White layer and windows. On clear films, a white ink layer behind the colours makes the pouch opaque; leaving the white out creates a window. The white separation is prepared as its own colour.
- Clear zones. Seal areas, zipper position, valve position and laser score lines are marked on the dieline so that ink, especially heavy coverage, does not sit where it could interfere with sealing or features.
- Distortion and shrinkage. Flexo plates are distorted to allow for plate stretch around the cylinder; films that stretch under web tension (PE in particular) need allowances agreed with the press room.
- Proofs. A contract proof or digital proof shows colour intent, and a press proof or printed sample may follow. Proof types and the approval workflow are covered in our packaging artwork guide; colour standards and Delta E tolerances in Pantone vs CMYK in packaging.
How gravure cylinders are made
A gravure cylinder is a steel base with a copper layer into which millions of small cells are engraved; the cell volume sets how much ink each point carries. Engraving is done electromechanically, with a diamond stylus cutting cells as the cylinder turns, or by laser, either directly into a suitable metal or by ablating a mask before etching. Screen rulings for packaging gravure are typically fine enough to give a continuous-tone appearance.
After engraving and proofing, the cylinder is chrome plated. The hard chrome protects the soft copper from wear by the doctor blade and abrasive inks, which is why chromed cylinders can run very long and repeat orders without visible change. For a reorder with unchanged artwork, cylinders are taken from storage and reused; a changed colour means re-engraving that cylinder (the copper is turned down or re-plated and engraved again). Each colour, including white and any varnish, needs its own cylinder, and cylinder engraving is a separate queue that is often outsourced to specialist engravers.
Flexo plates and sleeves
Flexo for flexible packaging uses photopolymer plates, increasingly high-definition and flat-top-dot types for film, mounted with cushioned tape on sleeves. Tape compressibility affects dot gain, so it is chosen for the image (harder for solids, softer for highlight dots). Plates cost less and are made faster than cylinders but wear on long runs. The printing and prepress glossary defines the terms you will see on a plate or cylinder quotation.
Surface printing or reverse printing?
Most laminated pouches are reverse printed: the design is printed as a mirror image on the inside face of a clear outer film (PET, BOPP, clear MDO-PE), then laminated so the ink is buried between the outer film and the adhesive. Surface printing on the outside face is used on paper outers, on unlaminated or single-web structures and on some mono-material films, and it normally needs an over-print varnish.
| Factor | Reverse printing (then laminated) | Surface printing |
|---|---|---|
| Ink position | Between outer film and adhesive | On the outside face |
| Rub and scuff resistance | Very high; film protects the ink | Depends on ink and varnish |
| Gloss | From the outer film | From varnish or ink |
| Sealing jaw contact | Jaws touch clean film | Jaws touch ink or varnish; needs heat-resistant varnish or jaw covers |
| Typical substrates | PET, BOPP, clear MDO-PE | Kraft paper, some PE and PP films |
| Food-contact position | Ink not in direct contact with food, but set-off and migration still managed | Ink on the outside; set-off onto the food side of the reel is the main risk |
| Ink system | Lamination-grade inks compatible with the adhesive | Surface-print inks with rub and heat resistance |
Lamination-grade inks are formulated to bond to the adhesive; an ink that is fine for surface print can cause delamination when buried in a laminate. This is one reason the ink system is fixed together with the adhesive and the structure, not chosen independently.
How does rotogravure printing work for pouches?
Rotogravure (Tiefdruck in German) prints by filling engraved cells with low-viscosity ink, wiping the surface clean with a steel doctor blade and pressing the film against the cylinder with a rubber impression roller so the ink transfers. Each colour has its own print unit and dryer, and pouch presses commonly have eight to ten or more units. It gives smooth gradients and very stable colour over long runs, which is why it remains the standard for long-running coffee, snack, confectionery and pet-food films.
How a gravure unit works, in sequence:
- The cylinder turns in an ink pan or is fed by an ink applicator; cells fill with ink.
- The doctor blade wipes ink from the non-image surface.
- The impression roller presses the film onto the cylinder; ink leaves the cells. Electrostatic assist is often used to pull ink from the cells and reduce missing dots in highlights.
- The web passes through a hot-air dryer before the next colour so the ink is dry enough not to pick off or smudge.
Key parameters and why they matter:
- Ink viscosity. Gravure inks are thin and solvent evaporates constantly at the ink pan, so viscosity drifts. Automatic viscosity controllers or regular flow-cup checks keep colour strength stable; drifting viscosity is a common cause of colour variation within a run.
- Solvent system. Packaging gravure in Europe mostly uses solvent-based inks with ester and alcohol solvents (for example ethyl acetate, ethanol, n-propyl acetate), with nitrocellulose or polyurethane binders chosen for lamination or surface print. Water-based gravure inks exist but are less common on film because they dry more slowly.
- Drying. Air temperature and volume in each dryer must remove solvent without overheating heat-sensitive films such as BOPP or PE. Under-dried ink leaves residual solvent, which can cause odour, poor bond strength and food-contact problems later.
- Solvent emissions. Solvent-laden air is captured and either recovered or destroyed in thermal oxidisers to meet industrial emissions rules; this is a significant part of a gravure plant's infrastructure.
- Register. Each colour must land exactly on the previous ones. Automatic register control reads printed marks and adjusts each unit's cylinder position. Web tension control is what keeps register stable on stretchy films.
- Speed. Gravure presses run at high web speeds, typically several hundred metres per minute, depending on press, film, ink coverage and drying capacity.
Long-run economics: cylinders are the most expensive image carriers in packaging print, but they last for very long runs and repeat orders, and running cost per metre is low. Gravure is therefore cheapest per pouch for large, stable designs and least economical for short runs or frequently changing artwork. Our packaging printing methods guide compares the processes across all packaging types.
How is CI flexo used for flexible packaging?
Flexible packaging flexo is run mainly on central-impression (CI) presses, where the film wraps around one large temperature-controlled drum and all colour stations (typically six to ten) print onto it while it lies firmly on the drum surface. Because the web does not travel freely between colours, register on stretchy films is tight, and modern HD plates bring quality close to gravure for many designs at lower tooling cost.
| Parameter | Typical range or practice (indicative) | Why it matters |
|---|---|---|
| Anilox for process colours | Fine screens, typically around 800-1,200 lines per inch with low cell volume (roughly 2-4 cm³/m²) | Fine dots and vignettes need a thin, even ink film |
| Anilox for solids and white | Coarser screens, typically around 300-500 lines per inch with higher volume (roughly 4-8 cm³/m²; opaque white often needs the upper end or more, so confirm the volume with the ink and anilox suppliers) | Opacity of white and density of solids |
| Ink systems | Solvent-based dominant on film; water-based on paper and some films; UV or EB-curing inks in some applications | Drying speed, adhesion, lamination compatibility, food-contact suitability |
| Between-colour drying | Hot-air dryers between stations plus a tunnel dryer after the drum | Prevents trapping problems and residual solvent |
| Plates | Photopolymer, HD or flat-top dots, mounted on sleeves | Highlight reproduction, quick changeovers |
| Drum temperature control | Drum held at a set temperature | Keeps film dimensions and register stable |
CI flexo suits medium to long runs and designs that change more often than gravure economics would allow. The same press type is used for printed plastic bags; our guide to how plastic bags are made covers flexo on single-web PE film.
When is digital printing used for pouches?
Digital printing is used for short runs, launches, seasonal editions and ranges with many versions (flavours, languages, retailers), because it needs no cylinders or plates and every metre can differ. Roll-fed digital presses for flexible packaging use liquid electrophotography or inkjet (water-based or UV-curing); the printed film is then laminated and converted like any other.
Practical points:
- Web widths are typically narrower than on gravure and CI flexo presses, so fewer pouches fit across the web.
- Some films need a primer or a specific surface treatment for the digital ink to adhere.
- For food pouches, the digital ink system must be suitable for reverse printing and lamination, with food-contact documentation that covers the full structure, not just the ink.
- Running cost per square metre is higher than gravure or flexo, so digital is economical up to a crossover quantity that depends on pouch size, colours and the conventional alternative. That crossover is set at quotation.
- Some digital pouch lines are built as short-run systems with smaller laminators and pouch machines matched to digital press output.
Food-contact considerations in pouch printing
Pouch inks must not transfer to the food, either by migrating through the laminate or by set-off, where ink transfers from the printed face to the food-contact face when the film is wound on a reel. Converters manage this with suitable ink systems, full drying, controlled winding tension and good manufacturing practice under Regulation (EC) No 2023/2006.
Points buyers commonly ask about:
- GMP. Regulation (EC) No 2023/2006 requires a quality assurance and control system for food-contact materials; its annex sets rules for printing inks on the non-food-contact side: printed surfaces must not come into direct contact with food, and ink substances must not transfer to the food-contact side by set-off or through the substrate in amounts that would breach Regulation (EC) No 1935/2004.
- Ink references. EuPIA guidance and the Swiss Ordinance SR 817.023.21 (Annex 10) are widely used market references for packaging inks. Germany's Printing Ink Ordinance under the Bedarfsgegenständeverordnung applies from 1 January 2027, after a transition period ending 31 December 2026.
- Reverse print is not automatically safe. Thin outer films and sealants do not form an absolute barrier for every substance, so ink composition and migration testing still matter.
- UV and EB inks. Uncured residues (photoinitiators, monomers) are a known migration concern, so low-migration formulations and full cure are needed if these systems are used for food packaging.
Documents to request and how compliance is shown are covered in our food-contact packaging compliance guide.
How does pouch lamination work?
Lamination (Kaschierung in German) bonds the printed film to one or more further webs, either with a reactive adhesive (solvent-based or solventless) or with a layer of molten polymer (extrusion lamination). A two-layer laminate needs one pass; a three-layer laminate such as PET/ALU/PE typically needs two passes, or one pass on a tandem laminator with two laminating stations.
| Method | How the bond is made | Typical dry coat weight (indicative) | Strengths | Limits |
|---|---|---|---|---|
| Solvent-based adhesive lamination (dry bond) | Two-component polyurethane adhesive dissolved in solvent (commonly ethyl acetate) applied by a gravure roller, dried in a tunnel, then nipped to the second web | Typically around 2.5-4.5 g/m², higher for demanding applications | High-performance bonds; good for aggressive products, high-temperature uses and foil | Solvent drying and emissions; residual solvent to control; higher energy use |
| Solventless lamination | Two-component polyurethane (isocyanate and polyol components) mixed just before use, applied at 100 % solids by a heated multi-roll metering system, nipped immediately | Typically around 1.2-2.5 g/m² | No drying tunnel, low energy, no adhesive solvent residues, fast changeover | Low initial bond (green tack), so web handling is critical; longer cure for some systems; pot life limits |
| Extrusion lamination | Molten polymer (usually LDPE, sometimes PP) extruded as a curtain from a flat die into the nip between two webs, then cooled on a chill roll | Polymer layer typically in the range of roughly 10-25 g/m² | No reactive adhesive cure; the extruded layer adds thickness and stiffness; common for paper/PE and foil structures | Needs primers or surface treatment; high melt temperatures; less suited to heat-sensitive or very thin films |
| Water-based adhesive lamination | Water-based adhesive dried before nipping | Low | No organic solvent | Mainly for less demanding film/film and paper/film laminates |
Process parameters that decide bond quality:
- Coat weight. Too little adhesive gives weak or patchy bonds and poor appearance through clear films; too much wastes adhesive, lengthens cure and can increase residual monomers. Converters check coat weight by weighing laminated and unlaminated samples of known area.
- Mix ratio (two-component systems). The isocyanate-to-polyol ratio is metered by a mixing unit. An excess of isocyanate leaves more unreacted material, which can matter for migration; too little leaves the adhesive under-cured and soft.
- Nip temperature and pressure. These set wetting of the adhesive onto both webs and remove trapped air.
- Web tension. Each web is stretched slightly under tension. If tensions are not balanced, the webs relax differently after lamination, causing curl or tunnelling.
- Surface treatment. Both web surfaces must have sufficient wetting tension for the adhesive to wet them.
- Ink compatibility. Heavy ink layers, especially white and metallic inks, are the usual weak point in a laminate; bond strength is often lowest in heavily printed areas.
Why does laminate curing take days, and why does it matter for migration?
After lamination, the two components of a polyurethane adhesive continue to react until the bond reaches full strength and the reactive monomers are used up. The laminate is therefore stored in a warm, temperature-controlled cure room, typically at around 35-45 °C, for a period that ranges from roughly one day to a week or more depending on the adhesive, coat weight and structure. Slitting and pouch making before full cure risks weak bonds, tunnelling and migration problems.
Why it matters:
- Bond strength. A green (uncured) laminate can be peeled apart easily. Bonds build over the cure period; bond strength is typically tested at the end of cure, not only immediately after lamination.
- Primary aromatic amines (PAAs). Adhesives based on aromatic isocyanates (such as MDI or TDI) contain isocyanate groups that, if they have not fully reacted, can react with moisture to form primary aromatic amines. Some PAAs are classified as carcinogenic, and Regulation (EU) No 10/2011 does not allow PAAs (other than those specifically listed) to be released into food in detectable quantities. Migration of PAAs falls as cure progresses, which is why converters set a minimum cure time and test laminates for PAA migration before release, typically with an acidic food simulant. Aliphatic adhesive systems are an alternative used in some applications.
- Sealing performance. Uncured adhesive can soften under sealing heat, affecting seal appearance and strength.
- Odour and residuals. In solvent-based lamination, part of the cure period also lets residual solvent fall to acceptable levels.
Cure time is one of the fixed elements of a pouch lead time that cannot simply be shortened by adding shifts. Faster-curing adhesive systems exist and are chosen where speed matters, but the converter still verifies cure before release. In a three-layer structure laminated in two passes, the first lamination is often cured, at least partly, before the second pass.
Slitting and rewinding
After cure, the wide laminate (often more than a metre wide) is cut on a slitter-rewinder into narrower reels: the width needed by the pouch making machine, or the reel width specified by the customer for form-fill-seal. Edge trim is removed and each reel is wound to a set length or diameter on a core.
What happens and what is controlled:
- Slitting method. Razor slitting is common on thin films; shear (rotary knife) slitting gives cleaner edges on tougher laminates and foil structures.
- Winding tension and taper. Too tight and the reel can block (layers stick) or set off; too loose and it telescopes in transport.
- Splices. Joins where a web break was repaired are flagged and limited in number, because FFS lines and pouch machines may stop or produce rejects at splices.
- Defect removal. Many converters run reels through 100 % inspection or re-wind them to remove marked defects.
- Laser scoring. Where pouches need a laser-scored tear line, a laser station partly ablates the outer film along the line, often at slitting or on a dedicated machine, in register with the print.
For roll stock, the reel specification is the customer's: reel width, core inner diameter (commonly 76 mm or 152 mm), maximum outer diameter or weight, unwind direction (which face out and which edge leading), eye mark position and colour, and the maximum number of splices per reel.
How does a pouch making machine work?
A pouch making machine unwinds one or more laminate reels, brings the webs together sealant-to-sealant, forms gussets, inserts zippers and other features, seals the pouch outline in a series of heated sealing stations, cools the seals, and cuts individual pouches, all in register with the printed design. The web moves intermittently: it advances one pouch length (or a set number of lengths), stops while sealing bars close, then advances again.
The main machine types match the main formats (described for buyers in pouch types: stand-up, flat-bottom, side-gusset and flat):
| Machine type | Formats produced | How the pouch is built |
|---|---|---|
| Three-side-seal machine with stand-up attachment | Three-side-seal flat pouches, stand-up pouches (doypacks), with or without zipper | Two webs (or one web slit into front and back) are sealed on three sides; a bottom gusset web is inserted for stand-up pouches |
| Side-gusset / centre-seal bag machine | Side-gusset bags, quad seal bags | A single web is formed around a tube with a back seal (fin or lap); side gussets are folded in; for quad seal, the four vertical corners are sealed |
| Flat-bottom (box pouch) machine | Flat-bottom pouches | Front and back panels, two side gussets and a separate or folded base are formed and sealed in several steps; the most complex and usually slowest route |
| Spout insertion machine | Spouted pouches | Spout fitments are placed into pre-made pouches and sealed with shaped heated jaws; sometimes integrated inline |
Stand-up pouch (doypack) production step by step
- Unwind and register. The front and back webs are unwound and kept in register with the print by photocells that read register marks.
- Bottom gusset insertion. A gusset web, folded into a W shape, is fed between the front and back webs at the bottom edge. In the classic round (Doyen) bottom, small holes are punched in the gusset so that the front and back panels fuse to each other through the holes; this locks the bottom corners and helps the pouch stand. K-seal and plough-bottom styles use different seal shapes or fold the base from the same web.
- Zipper application. A zipper profile is fed from a reel across the web, positioned below the top edge and tacked to both panels. The zipper ends are flattened, often by ultrasonic sealing, where they cross the side seals so no leak channel remains.
- Longitudinal and cross sealing. Heated seal bars seal the bottom gusset, side seals and zipper flanges. Sealing is usually split across several stations so each one needs only a short contact time at the line's speed.
- Cooling. Water-cooled bars press the hot seals flat, setting the seal and reducing distortion and curl.
- Features. Tear notches are punched in the side seal, hang holes (round or euro slot) are punched in the top seal area, valve holes are punched and degassing valves applied, corners are die-cut round.
- Cutting. A cross cutter separates individual pouches in register with the print; rejects identified by sensors are diverted.
- Counting and stacking. Pouches are counted into stacks for packing.
Valves can be applied during pouch making for pre-made pouches, or on the filling line for roll stock, as described in our article on pouch features. Spouts are typically inserted after the pouch is made, on a separate machine or a dedicated inline station.
Which sealing parameters decide seal quality?
Seal quality depends on three parameters working together: jaw temperature, dwell time (how long the jaws stay closed) and pressure. The aim is to bring the sealant interface above its seal initiation temperature long enough for the two sealant layers to fuse, without overheating the outer film or squeezing the molten sealant out of the seal area.
| Parameter | What it controls | Too low | Too high |
|---|---|---|---|
| Jaw temperature | Heat reaching the sealant interface through the outer layers | Weak or peelable seals, leaks | Outer film shrinks, wrinkles or sticks to jaws; sealant thins at seal edge (weak "edge" failure); print distortion |
| Dwell time | Total heat energy delivered | Incomplete fusion | Same effects as excessive temperature; lower output |
| Pressure | Contact between layers; flow of sealant | Channels and voids, especially at gusset and zipper steps | Sealant squeezed out; thinned seal; damage to barrier layers |
| Cooling | Setting the molten seal | Seals distort or open slightly before setting | Rarely an issue |
Jaw temperatures are always higher than the temperature actually reached at the sealant interface, because heat must pass through the outer film, ink, adhesive and any barrier layer. Thicker laminates and foil structures change heat transfer, so settings are developed per structure. Sealing jaws for heat-sensitive outer films are often covered with PTFE-coated fabric.
The seal window is the temperature range between the lowest setting that gives the specified seal strength and the highest setting before the outer film is damaged. PET outer films with PE sealants have a wide window because PET withstands far higher temperatures than the PE seals at. The window narrows as the melting points of the outer and inner layers come closer together, which is the central problem of mono-material pouches.
Critical seal areas are where the number of layers changes: the junction of side seals and the bottom gusset (four layers next to two), zipper ends and spout fitments. Most leaks in finished pouches start at one of these points. For pouches that will be sealed again by the customer on a filling line, hot tack (seal strength while still hot) and seal-through-contamination performance of the sealant also matter.
Why are mono-PE and mono-PP pouches harder to make?
Mono-material pouches are harder to make because the outer film and the sealant belong to the same polymer family, so they soften at similar temperatures. The seal window becomes narrow, the outer film stretches more during printing and lamination, and the barrier layers are thinner and more fragile. Converters compensate with modified sealants, heat-resistant coatings, slower settings and tighter tension control. The recyclability case for these structures is covered in recyclable mono-material pouches and the PPWR.
| Challenge | Mono-PE (MDO-PE or BOPE outer / PE sealant) | Mono-PP (BOPP outer / CPP sealant) | Common countermeasures |
|---|---|---|---|
| Heat resistance | Outer film melts only somewhat above the sealant; risk of outer film sticking or shrinking at jaws | Better than mono-PE, but the margin is much smaller than with PET/PE | Low-seal-initiation sealants (metallocene PE, plastomers), heat-resistant over-print varnish, jaw covers, lower temperature with longer dwell |
| Print register | PE stretches more under web tension; register and repeat length drift | BOPP is stable and well established | Lower and tightly controlled web tension, drum-based (CI) printing, careful drying temperatures |
| Seal window | Narrow | Narrow to moderate | Sealant selection, multiple sealing stations, careful set-up trials |
| Barrier | EVOH in the sealant, metallisation or coatings; EVOH sensitive to humidity | AlOx/SiOx-coated or metallised BOPP; coatings can crack | Avoid over-stretching coated films; protective top coats; flex testing |
| Stiffness and stand-up | Lower; pouch may slump | Good | Thicker or oriented films, gusset design |
| Curl | More prone, because the stretchy PE outer film relaxes after lamination | Moderate | Balanced tension, symmetrical structures |
| Features | Zipper and valve should be PE-based | Zipper and valve should be PP-based | Source matching components early; confirm availability |
Mono-material projects usually need more trial work at the start: sealing trials, drop and burst tests, and shelf-life checks on filled pouches. Grading under the PPWR design-for-recycling criteria is explained in PPWR recyclability grades; the detailed criteria are due by delegated act in 2028, so no structure can be given a definitive grade yet.
Which quality tests are run on pouch laminates and finished pouches?
Pouch quality is checked at every stage: incoming films, printing (colour, register, defects), lamination and cure (coat weight, bond strength, residual solvent, migration), and finished pouches (seal strength, leak and burst, dimensions, features). The table lists the tests buyers most often see on a specification or certificate of analysis; the testing and quality glossary defines the terms.
| Test | Common method references | Stage | What it shows |
|---|---|---|---|
| Colour and print | Spectrophotometer readings (Delta E against the approved standard); visual check against the approved sample | Printing | Colour drift, missing print, register |
| Bond strength (peel) | ASTM F904 and similar T-peel methods, often reported in N/15 mm | After cure | Whether layers are adequately bonded; failure mode (adhesive failure vs film tear) |
| Coat weight | Gravimetric (weighing samples of known area) | Lamination | Adhesive quantity |
| Residual solvents | Headspace gas chromatography, for example EN 13628-1 and -2 | After printing/lamination | Solvent left in the laminate; odour and taint risk |
| Migration | Overall and specific migration under Regulation (EU) No 10/2011 conditions; PAA testing for polyurethane adhesive laminates | Validation and periodic checks | Compliance of the plastic layers for the intended food and use |
| Seal strength | ASTM F88, often reported in N/15 mm in Europe | Pouch making | Strength of each seal; failure mode |
| Hot tack | ASTM F1921 | Material qualification (mainly roll stock) | Seal strength immediately after sealing, relevant to FFS lines |
| Leak | Vacuum chamber bubble emission (ASTM D3078), dye penetration | Finished pouches | Leak paths at seals, gussets, zipper ends, valves |
| Burst | Inflation tests (ASTM F1140 unrestrained, ASTM F2054 restrained) | Finished pouches | Overall seal integrity and weakest point |
| Drop | Filled-pouch drop tests to an agreed height and orientation | Validation | Performance with real product weight |
| OTR | ASTM D3985, ISO 15105-2 | Material qualification | Oxygen barrier at stated conditions |
| WVTR | ASTM F1249, ISO 15106 series | Material qualification | Moisture barrier at stated conditions |
| COF | ISO 8295, ASTM D1894 | Incoming and laminate | Slip on filling machines and in stacks |
| Dimensions | Width, height, gusset, seal widths, zipper and notch position, print-to-cut register | Pouch making | Fit to filling equipment and approved drawing |
| Zipper and valve | Opening force; valve opening pressure | Pouch making | Feature function |
Interpreting barrier figures is covered in pouch laminate structures and barrier properties. How to agree sampling plans, pre-production approval and AQL inspection is covered in our packaging quality control guide.
Residual solvent limits are set by customer specification rather than a single legal figure; many brand owners specify a low total in mg/m² with tighter limits for individual solvents. Ask what limit your supplier works to and how often it is tested.
Common pouch defects: causes, prevention and how to spot them
Most pouch defects trace back to one of four sources: materials (film, ink, adhesive), lamination and cure, sealing settings, or storage and handling. The table below lists the defects buyers most often meet.
| Defect | Typical cause | Prevention in production | How the buyer can detect it |
|---|---|---|---|
| Delamination | Incomplete cure, low coat weight, low surface treatment, ink not lamination-grade, aggressive product (oils, essential oils, acids) attacking the bond | Full cure before release; coat weight and treatment checks; ink/adhesive compatibility; product resistance testing | Layers separate at seals or corners; peel a seal edge; bubbles or whitening in printed areas, often after filling and storage |
| Tunnelling | Unbalanced web tension, low green tack in solventless lamination, differential shrinkage, gas from adhesive reacting with moisture | Balanced tensions; adhesive choice; humidity control | Raised channels or wrinkles running along the web in the laminate |
| Wrinkles | Web tension or alignment faults; foil handling; overheated sealing | Tension control, roller alignment, seal settings | Creases across seals or panels; distorted print |
| Seal leaks | Seal temperature or pressure too low, product dust in the seal area, channels at gusset steps or zipper ends | Validated seal settings; gusset holes and zipper end crush; clean filling | Leak or bubble test, squeeze test on filled pouches, product loss in cartons |
| Zipper failure | Weak zipper flange seal, wrong profile for fill weight, zipper not crushed at ends, misalignment | Correct zipper selection and sealing; alignment control | Zipper pulls away from panel, does not close, leaks at ends |
| Print misregister | Web tension fluctuation, film stretch, register control faults | Automatic register control, stable tension | Colour fringes, white showing at edges of colours, text blurred |
| Print-to-cut misregister | Photocell or register mark issues on the pouch machine | Mark design and sensor set-up | Design shifted relative to the pouch edges or seals |
| Curl | Unbalanced tension in lamination, moisture uptake of OPA or paper, differential shrinkage, sealing heat | Balanced tension, conditioning, structure design | Pouches or roll stock edges curl; poor feeding on filling machines |
| Set-off and odour | Insufficient drying, high winding tension, residual solvent | Drying control, residual solvent testing | Ink traces on the inside surface; solvent smell when a stack is opened |
| Pinholes and flex cracks | Thin foil, over-stretching of metallised or coated films, rough handling | Material grade, tension control, flex testing | Higher than expected OTR or WVTR; light visible through foil pouches |
| Blocking | Excessive winding tension or heat; insufficient anti-block | Winding control; storage temperature | Pouches stick together in stacks or layers stick in reels |
| Metal pick-off | Poor metal adhesion on metallised film | Material selection; bond testing | Metal layer visible on the peeled sealant during bond tests; spotty metallic appearance |
For reorders, ask the supplier to keep retained samples from each lot so any later complaint can be checked against the same production reference.
How are pouches packed and shipped?
Pre-made pouches are counted into stacks, banded or bagged, and packed in corrugated cartons, usually with a liner, then palletised and stretch-wrapped. Roll stock is wound on cores and packed either standing on pallets (core vertical) with separators, or suspended horizontally so the reel surface does not carry weight.
What a buyer should agree:
- Count per stack and per carton, and how stacks are oriented if pouches are loaded into the magazine of an automatic pre-made pouch filler (zipper side, front face up).
- Carton labelling with product code, artwork version, production lot and quantity, which supports traceability under Article 17 of Regulation (EC) No 1935/2004.
- Inner protection: liners or bags to keep out dust and moisture, especially for paper-based pouches and nylon-containing laminates.
- For roll stock: reel orientation on the pallet, core plugs, edge protection, and labels on both the reel core and the reel wrapping.
- Pallet type and maximum height for your warehouse and transport mode.
Storage conditions matter for pouches: moderate temperature, dry conditions and no direct sunlight. Heat can cause blocking and curl, and slip additives in the sealant migrate over time, so COF and sealing behaviour can change on very old stock. Many converters recommend a usage period for laminates and zipper pouches; ask for it. Transport and import documentation are covered in our guide to sourcing packaging from Türkiye.
How does the production route drive MOQ, cost and lead time?
The production route explains most of what you see in a pouch quotation. Gravure cylinders and flexo plates are a one-off cost per design spread over the run; lamination passes and cure add fixed time; slitting and pouch machine set-up add fixed waste and time per order; digital printing removes tooling but carries a higher running cost.
| Driver | Effect on MOQ and cost | Effect on lead time |
|---|---|---|
| Gravure cylinders | High one-off cost per colour per design; favours large, stable runs | Engraving queue for new or changed designs; reused on reorders |
| Flexo plates | Moderate one-off cost per design | Faster to make than cylinders |
| Digital printing | No tooling; higher cost per pouch | No tooling time |
| Special films (mono-material, barrier, matt) | Material minimums from film suppliers can set the order minimum | Film procurement time |
| Number of lamination passes | More passes, more set-up waste and handling | Each pass adds lamination time and cure |
| Cure | No direct cost, but ties up stock and space | Typically days per adhesive lamination |
| Slitting | Set-up per reel width | Short, but a separate step |
| Pouch machine set-up | Set-up waste per format, size and feature; flat-bottom and spouted pouches cost more to set up | Machine availability; slower formats take longer |
| Features | Zippers, valves, spouts add component cost and may have their own minimums | Component sourcing |
| Number of designs | With gravure or flexo, each design carries its own tooling and make-ready | Each design adds changeovers |
Rather than repeat procurement guidance here, see packaging MOQ, packaging cost drivers and packaging lead times. For pouches specifically, the parts of the lead time that are least compressible are cylinder making for new designs, lamination with cure, and transport.
Food-contact hygiene in pouch production
Food pouches are made under good manufacturing practice as required by Regulation (EC) No 2023/2006, which means a documented quality system, control of materials and suppliers, and records that allow traceability. Many brand owners also ask whether their converter is certified to a recognised hygiene and safety scheme for packaging manufacturers.
Schemes buyers commonly ask about include BRCGS Packaging Materials, FSSC 22000 (which builds on ISO 22000 with packaging-specific prerequisite programmes) and ISO 22000 itself. Ask for the certificate, its scope and the certifying body, and check that the scope covers the products and site that will make your pouches. The certification status of any specific supplier, including ours, should be confirmed directly with that supplier.
Typical hygiene controls in a pouch plant:
- Controlled access, clothing and hand-hygiene rules in production areas, with stricter rules where the food-contact surface is exposed.
- Glass and brittle plastics policy, controlled tools and blades, and foreign-matter prevention at slitting and pouch making.
- Pest control and building maintenance programmes.
- Segregation of food-contact and non-food materials, inks and adhesives; clear labelling of work in progress.
- Lot traceability from film and adhesive batches through printed reels to finished cartons.
- Documented management of changes to inks, adhesives and films, because each change can affect migration and the Declaration of Compliance.
Under Regulation (EU) No 10/2011 the plastic layers of a pouch need a Declaration of Compliance supported by migration testing; what the declaration should contain is covered in our food-contact packaging compliance guide. Where pouches are sold into the EU from 2030, recyclability grading under the PPWR also applies; see PPWR recyclability grades. Your obligations depend on your role in the supply chain; confirm them with the competent authority or your compliance scheme.
Terminology by market
Production terms appear in supplier documents in several languages:
- German: Verbundfolie (laminate film), Kaschierung (lamination), Tiefdruck (gravure), Standbodenbeutel (stand-up pouch), Rollenware (roll stock).
- Dutch: laminaat (laminate), diepdruk (gravure), stazak (stand-up pouch).
- UK and US: "roll stock" and "rollstock" are both used; US suppliers often quote film thickness in mil (1 mil = 25.4 µm) and gauge.
What to ask a pouch manufacturer about the production process
Use this checklist when you compare suppliers or prepare a request for quotation. It complements the general packaging RFQ guide and our guide to choosing a packaging manufacturer.
Specification you should provide:
- Product, fill weight, fill method (manual, pre-made pouch filler, form-fill-seal) and any hot fill, nitrogen flush or freshly roasted coffee.
- Target structure or protection needs, shelf life and markets of sale.
- Format, dimensions and features, with an approved dieline.
- Supply form: pre-made pouches (count per carton, stack orientation) or roll stock (reel width, core, outer diameter, unwind direction, eye mark position, splice limits).
- Number of designs and quantity per design.
Questions to ask about the process:
- Which print process will be used for this quantity, and are cylinders or plates reusable on reorders?
- Is the design reverse printed, and which ink system is used (lamination-grade, low-migration documentation)?
- Which lamination method and adhesive system, how many passes, and what minimum cure time before slitting?
- How is cure verified before release (bond strength, PAA testing for polyurethane adhesives)?
- Which tests are reported per lot: bond strength, seal strength, residual solvents, COF, dimensions?
- For mono-material structures, what seal window has been established and what trials are proposed?
- Which Declaration of Compliance and migration test reports cover the finished structure?
- Which hygiene or food-safety scheme certificate covers the production site, if any, and what is its scope?
- How are lots labelled and retained samples kept?
When the brief is ready, send it through our contact page or start from the custom printed stand-up pouches page; the structure, process route and specifications are confirmed at quotation and technical review. For the other packaging families, return to how custom printed packaging is made.