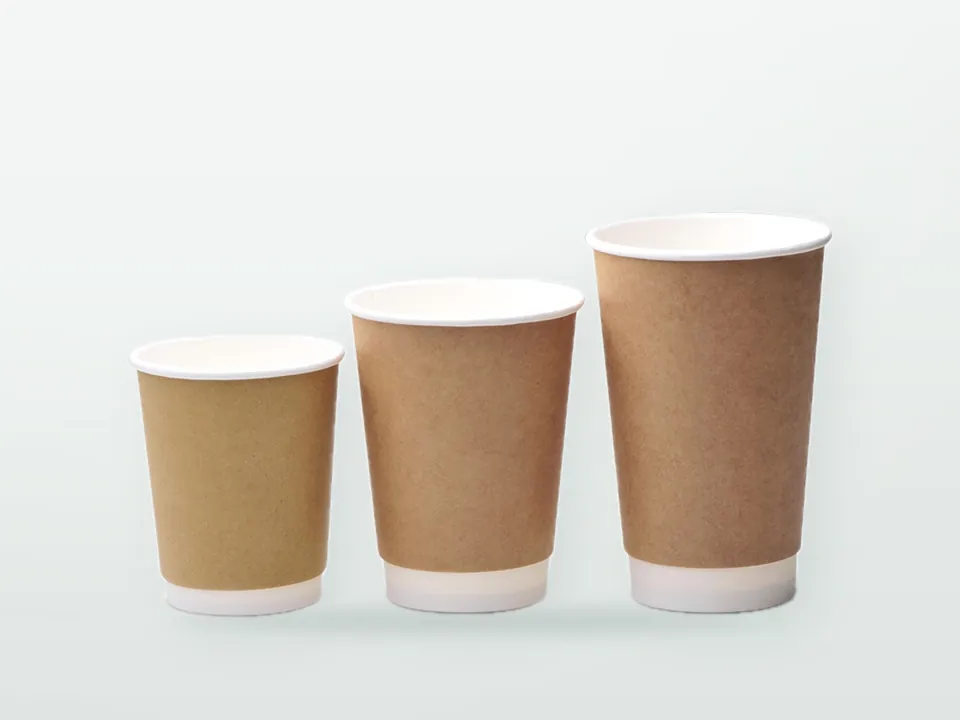

Paper cups and food containers are printed flat on barrier-coated board, cut into curved blanks and formed on machines that seal the side seam, fit the bottom and curl the rim, and each of those stations decides how the finished cup performs. Two suppliers can both quote a "12 oz double wall cup, PE-lined, CMYK print": one sample set passes a 30-minute hot-water test, the other weeps at the base after ten minutes and loses its lids in the delivery bag. The difference lies in board grade and coat weight, in how the seam and bottom were sealed and in how round the rim came off the curling station. Knowing which station controls which property lets a buyer write a specification that holds and read a supplier's answers critically.
This guide follows a paper cup, a soup container, a salad bowl and an ice cream cup from coated board to counted sleeve. It is part of the How Packaging Is Made series and describes how the industry generally works; individual factories differ in equipment and routing. Product-level buying decisions are on the custom printed paper cups and custom printed paper food containers hubs.
How are paper cups made? The production flow in brief
A paper cup is made from food-grade paperboard (cupstock) that is coated with a barrier, printed flat, die-cut into curved sidewall blanks called fans, and then formed on a cup machine that wraps each fan around a conical mandrel, seals the side seam, inserts and seals a bottom disc, and rolls the rim. Paper food containers and bowls follow the same route on larger tooling.
- Cupstock reel
- barrier coating (PE extrusion, dispersion or PLA)
- printing (sheet or reel)
- die-cutting fans; slitting bottom stock
- cup forming (side seam, bottom, rim curl)
- outer wrap for double or ripple wall
- inspection
- counting, sleeving, cartoning
- Board making and coating. A board mill produces cupstock, usually from virgin fibre. The barrier is applied by extrusion coating (PE or PLA) or by a dispersion coating line, either at the mill or at a specialist coater.
- Incoming inspection. The cup maker checks grammage, caliper, moisture, coat weight, surface treatment and documentation before the board is released.
- Prepress and tooling. Each cup size has its own fan dieline, cutting die and forming change parts. Plates are made for the chosen print process.
- Printing. Sheets are printed by offset; reels by flexo, web offset or, for very long runs, gravure. Inks go on the outside of the cup.
- Die-cutting. Printed sheets or reels are cut into fans. Bottom stock reels are slit to width and fed directly to the forming machine.
- Forming. The cup machine feeds, wraps and seals each fan, punches and seals the bottom, then curls the rim and ejects the finished cup.
- Secondary forming. Double wall and ripple wall cups receive a glued outer wrap on a separate wrapping machine or an inline unit.
- Inspection and packing. Cups are tested for leaks, seams, dimensions and print, then counted into sleeves and packed in cartons on pallets.
The rest of this guide takes each stage in turn and ends with a buyer's checklist.
Cupstock: what board are paper cups made from?
Paper cups are made from cupstock: a multi-ply, food-grade paperboard with high stiffness, a clean printing surface and internal sizing that resists liquid wicking into cut edges. It is almost always made from virgin fibre, because recycled fibre brings less predictable cleanliness, odour and migration behaviour into direct contact with drinks. In German the material is called Becherkarton.
Sidewall cupstock commonly ranges from roughly 170 gsm for small espresso cups to around 350 gsm for tall single wall cups and large bowls, before coating. The heavier the board, the stiffer the cup wall against squeezing, but every extra gram adds cost, weight and, in weight-based EPR schemes, fees.
| Item | Typical cupstock before barrier | What drives the choice |
|---|---|---|
| Espresso and sample cups, 2.5-4 oz | about 170-230 gsm | Small diameter is stiff by geometry |
| Single wall drinks cups, 7-8 oz | about 210-280 gsm | Squeeze resistance when hot |
| Single wall drinks cups, 10-20 oz | about 250-350 gsm | Taller wall, more column and hoop load |
| Double or ripple wall inner cup | about 210-300 gsm | Outer wrap adds stiffness |
| Cold cups (barrier both sides) | about 210-320 gsm | Must stay rigid when condensation forms |
| Portion, ice cream and snack cups | about 200-260 gsm | Short wall, small diameter |
| Soup containers and large bowls | about 280-350 gsm | Heavy fill load, wide diameter |
| Bottom stock | often lighter than the sidewall, commonly in the 170-260 gsm region | Flat disc supported by the folded sidewall |
These are working ranges, not a standard; mills publish their own grade families and each cup maker sets grammage per size and machine. Board properties that matter beyond grammage are bending stiffness, caliper consistency (it affects seam thickness and rim curling), moisture content, surface smoothness for print, and edge-wick resistance. White cupstock has bleached surface plies; kraft cupstock has an unbleached brown outer face, and white-lined kraft combines a brown outside with a white inside. More on fibre grades in packaging paper grades explained and the materials glossary.
How is cupstock coated? PE extrusion, dispersion and PLA
Paperboard on its own cannot hold a drink and cannot be heat-sealed, so a barrier is applied before printing. The barrier does two jobs at once: it keeps liquid out of the fibre and it melts or softens during forming to bond the seam and bottom. How it is applied affects coat weight, sealing behaviour and print surface. Which barrier to choose for a given product, and what it means for recycling and claims, is covered in paper cup linings: PE vs aqueous dispersion vs PLA and barrier coatings for paper packaging.
PE extrusion coating
Low-density polyethylene (LDPE), sometimes blended with other polyethylenes, is melted in an extruder and pushed through a flat slot die as a thin molten curtain. The curtain falls into the nip between the moving board and a water-cooled chill roll, where it bonds to the board surface and solidifies in a fraction of a second. The chill roll's surface finish sets the PE finish (gloss or matt).
Adhesion depends on surface activation. The board is usually corona- or flame-treated before the nip, and the melt runs hot enough to oxidise slightly in the air gap, which helps it anchor to fibre. Too cold a melt or too short an air gap gives weak adhesion and a coating that peels; too hot can cause odour and taste issues from oxidation products, which is one reason odour testing matters for cups.
| Structure | Typical use | Typical PE coat weight |
|---|---|---|
| 1PE (inside only) | Hot drinks cups, dry or briefly held food | about 12-20 g/m² on the food side |
| 2PE (both sides) | Cold cups, soup containers, ice cream cups, delivery bowls | about 12-20 g/m² inside; outside often at the lower end of the range |
| Heavier single layer | Demanding hot-fill or long-hold uses | above 20 g/m² on the food side in some specifications |
Coat weights are indicative and vary by mill, product and machine. The coating must be continuous: pinholes, often caused by board surface defects or by moisture escaping from the board, are a leak path. Where the outer surface is PE (2PE cold cups and containers), the coater or printer applies corona treatment so inks will adhere; surface energy of around 38-42 mN/m is a commonly targeted range for printing on PE, checked with dyne pens or test inks.
Aqueous dispersion coating
Dispersion barriers are water-based polymer dispersions applied as liquid coatings and dried, rather than extruded as a melt. They can be applied on-machine, as part of the board machine's coating section, or off-machine on a separate coating line. Application methods include blade, rod, roll, film-press and curtain coating; drying uses infrared and hot air. Barrier performance usually comes from more than one layer, for example a pre-coat that closes the board surface and a top barrier coat.
Dry coat weights are typically lower than for PE extrusion, often below about 15 g/m² in total, which is the source of both their main advantage (less polymer, easier repulping) and their main process difficulty (less material available to form a seal). Formulations differ much more than PE grades do, so a dispersion cupstock from one mill may behave quite differently on the forming machine from another's.
A process point with a regulatory consequence: the EU Commission's SUP guidelines (2021/C 216/01, updated by C/2026/4813 in September 2026 for caps and lids only) do not mention dispersion coatings by name and contain no carve-out for them. Whether a dispersion-coated cup is a single-use plastic product depends on whether the coating polymer meets the plastic definition in Directive (EU) 2019/904. Ask the board supplier for a written statement on the polymer type before changing artwork that carries the "Plastic in product" marking.
PLA coating
Polylactic acid is extrusion-coated on the same type of line as PE. The resin must be dried thoroughly before extrusion because moisture degrades PLA in the melt, and the processing window is narrower than for PE, both at the coater and on the cup machine. PLA softens at lower temperatures than PE, so cup grades state a maximum use temperature. Under the SUP Directive, bio-based and compostable plastics remain plastics, so PLA-lined cups still need the marking.
Raw material checks and incoming inspection
Before coated board is released to the press, cup makers typically check that each delivery matches the specification and that its documentation covers the actual structure. A problem caught at goods-in becomes a claim against the board supplier; the same problem found in a formed cup can mean scrapping printed stock.
| Check | Typical method | Why it matters for cups |
|---|---|---|
| Grammage and caliper | ISO 536, ISO 534 | Seam thickness, stiffness, rim curling |
| Moisture content | ISO 287 (oven-dry) or calibrated meters | Low moisture cracks at the rim curl and bottom fold; high moisture blisters under heat and softens the cup |
| Bending stiffness | ISO 2493 type stiffness tester | Squeeze resistance of the finished cup |
| Water absorption of uncoated side | Cobb test, ISO 535 | Outer surface behaviour with condensation on 1PE products |
| Edge wick | Raw-edge immersion in hot water or a defined test liquid | Wicking at the inside seam edge |
| Coat weight | Gravimetric (coating stripped or weighed per area) | Seal strength and barrier continuity |
| Coating continuity | Dye or penetrant test for pinholes | Leaks through the barrier |
| Surface energy (PE side) | Dyne pens or test inks | Ink adhesion on 2PE surfaces |
| Odour | Sensory panel; EN 1230 type taint tests where specified | Off-odour transfers to drinks and food |
| Reel condition | Visual: edges, wrapping, core, splices | Damaged edges and splices cause feeding faults |
Documentation usually travels with the board: a declaration covering the paperboard against Framework Regulation (EC) 1935/2004, often referencing BfR Recommendation XXXVI as the de facto benchmark for paper in the EU, and a Declaration of Compliance for the plastic coating under Regulation (EU) 10/2011. For the US, buyers look for coverage under 21 CFR 176.170 for paper and board in contact with aqueous and fatty foods. Chain-of-custody certification (FSC or PEFC) matters only if a certified claim will be printed, and then the certificate has to run through every stage. More on documents in food-contact packaging compliance.
Conditioning is easy to overlook. Reels that arrive cold from a winter shipment can collect condensation if unwrapped in a warm hall, so they are usually left wrapped until they reach hall temperature. Board stored in very dry or very humid air changes moisture content, which changes how it prints, cuts and curls.
Prepress and tooling for cups and containers
Every cup size needs its own set of tools: a fan dieline, a cutting die, print plates per design, and forming change parts on the cup machine. That is why adding a size is far more expensive than adding a design.
The fan dieline
A cup sidewall is a truncated cone. Unrolled flat it becomes a curved band, the fan (also called the arc or sidewall blank), whose shape is set by the top diameter, bottom diameter and slant height. The cup maker's dieline marks the side seam overlap, the rim curl zone, the bottom fold zone, bleed and any areas that must stay free of ink or varnish. How to lay out artwork on that curved template without distortion is explained in paper cup printing and artwork on a tapered cup.
Imposition and yield
On sheets or reels, fans are nested head to tail, or in alternating rows, to get as many blanks as possible out of each sheet or repeat. The layout decides material yield and therefore cost: a wide, shallow bowl fan nests very differently from a tall, narrow cup fan. Where sizes share print and board, some printers gang fans of different sizes on one sheet; this works only if quantities per size are in the right ratio.
Plates, proofs and tools
| Tool | Process | Made per | Notes |
|---|---|---|---|
| Offset plates | Sheet-fed or web offset | Colour and design | Computer-to-plate aluminium plates; relatively inexpensive, but make-ready takes press time |
| Blankets | Offset | Press (wear item) | Not design-specific, but blanket condition affects print quality on board |
| Photopolymer plates or sleeves | Flexo | Colour and design | Cost rises with the number of colours |
| Gravure cylinders | Gravure | Colour and design | High cost; only for very long, stable runs |
| Flatbed cutting die | Sheet or reel-fed platen cutting | Cup size and layout | Steel rule die; resharpened or replaced with wear |
| Rotary die | Inline with reel printing | Cup size and repeat | Higher cost, long life on long runs |
| Forming change parts | Cup machine | Cup size | Mandrels, bottom punch, folding and curling tools |
Proofing runs from flat PDF and contract colour proofs to a printed-and-wrapped paper mock-up and, for a new size or substrate, a formed pre-production sample. Colour standards for cups that must match sleeves and carriers are covered in Pantone vs CMYK in packaging; general file preparation is in the packaging artwork guide. Terms used here are defined in the printing and prepress glossary.
How is cupstock printed?
Cupstock is printed flat, before cutting and forming. Sheet-fed offset is the most common route for full-colour cups on white board; reel-fed flexo is common for kraft cups and designs with a few solid colours; web offset and gravure appear on long runs; digital printing serves short runs and versioned designs. The choice follows the design, the board surface and the volume, as described in flexo vs offset vs gravure vs digital printing.
| Route | Format | Typical parameters | Ink systems | Fits |
|---|---|---|---|---|
| Sheet-fed offset | Coated board sheeted from reels | About 150-200 lines per inch, 175 common | Conventional low-migration oxidative or UV/LED-UV low-migration inks; water-based or UV overprint varnish | Full colour, fine type, gradients on white board |
| Flexo | Reels, often inline with cutting | About 100-150 lpi on paper; anilox volumes typically about 2.5-4 cm³/m² for screens, higher (roughly 4-8 cm³/m²) for solids and opaque whites | Water-based on paper surfaces; UV or specially formulated inks on PE | Kraft cups, spot colours, long repeat runs |
| Web offset (variable or fixed repeat) | Reels | Offset-quality screens on reels | Low-migration offset or UV inks | Long runs where reel-to-cut workflow is preferred |
| Gravure | Reels | Engraved cylinders, very consistent colour | Solvent- or water-based gravure inks | Very long, stable designs |
| Digital (inkjet or toner) | Sheets or reels | No plates; variable data possible | Systems specifically declared for food packaging use | Short runs, trials, seasonal and regional versions |
Some reel-fed cup presses use letterpress-type or dry offset (letterset) units. Dry offset is better known for decorating already formed plastic cups and tubs, where it prints all colours from one blanket in a single pass around the round object.
Printing on paper versus printing on PE
Hot cups with PE on the inside only are printed on the board surface, which takes water-based flexo and offset inks well. Cold cups and 2PE containers are printed on the outer PE coating. That surface is non-absorbent, so inks must dry by evaporation or curing rather than penetration, need corona treatment for adhesion, and are tested for rub and scratch resistance after freezing or condensation where relevant.
Ink, varnish and heat in forming
Print on cups meets heat twice after the press: at the side seam, where hot air or ultrasonic energy passes through the overlap, and at the bottom fold and knurl. Inks and varnishes must tolerate that heat without discolouring or blocking. The seal areas themselves are often specified as ink-free or varnish-free strips, because a heavy ink or varnish film between the layers can weaken the bond. Many specifications also keep the rim curl free of ink, as it is where lips touch the cup.
Food-contact ink considerations: set-off at three points
Ink sits on the outside of a cup, but in production and transport the printed face touches the food-contact face of the material three times: in the delivery pile of freshly printed sheets, in the rewound reel, and in the nested stack of finished cups. Components can transfer by invisible set-off at each point, and then migrate into the drink. Regulation (EC) 2023/2006 on good manufacturing practice requires that printing inks on the non-food-contact side do not transfer to the food-contact side in amounts that would breach food law.
In practice this means low-migration ink and varnish systems formulated for food packaging, full drying or curing before piling or rewinding (with UV, cure is checked rather than assumed), controlled pile heights and reel tension, and migration testing on finished cups where the risk assessment calls for it. Industry references include EuPIA guidance and the Swiss Ordinance SR 817.023.21. In Germany, the Printing Ink Ordinance (Druckfarbenverordnung, part of the Bedarfsgegenständeverordnung) introduces a positive list for inks on food-contact materials and applies from 1 January 2027. Ask your supplier which ink system is used and how compliance is documented.
The SUP marking is part of the print
For the EU, beverage cups that contain plastic, including PE- and PLA-lined paper cups, must carry the "Plastic in product" marking defined by Commission Implementing Regulation (EU) 2020/2151 under the SUP Directive (EU) 2019/904, in the language of the market where the cup is sold. On paper cups the marking is printed as part of the sidewall artwork, so it is fixed at plate stage: a missing or wrong-language marking means reprinting. Food containers, bowls and ice cream cups are not beverage cups and do not need this marking. Placement, size and language versions are covered in paper cup regulations in Europe and the UK.
Die-cutting fans and preparing bottom stock
After printing, the board is cut into fans, and bottom stock is prepared separately. Cutting accuracy matters more for cups than for most packaging, because the fan edge becomes the side seam and the rim, and any variation shows up as uneven seams, print that does not line up with the seam, or rims that curl unevenly.
Sidewall blanks
- Printed sheets are cut on flatbed (platen) die-cutters with a steel rule die. Several fans come from each sheet; the waste skeleton is stripped and the fans are collected into counted stacks.
- Printed reels are cut either on reel-fed flatbed die-cutters or with rotary dies inline with the press. Registration to print is controlled by printed eye marks read by a photocell, so each fan is cut where the artwork expects it.
- Fans are inspected for burrs, nicks, dust and print-to-cut register, then stacked, banded or boxed and delivered to the forming machine magazine. Damaged fan edges cause feeding stops and weak seams.
Die wear is gradual: a dull die crushes rather than cuts, leaves fibre dust and a ragged edge, and that edge is where liquid wicks in at the inside of the seam. Die maintenance intervals are a fair question for a supplier. Cutting tools and terms are explained in the converting and manufacturing glossary; folding carton die-cutting, which uses the same principle, is covered in how folding cartons and takeaway boxes are made.
Bottom stock
The bottom is not pre-cut. Bottom stock arrives as a narrow reel, slit to a width slightly larger than the bottom disc, and is fed directly into the forming machine, which punches each disc on the fly. The bottom stock carries its own barrier, usually on the side facing the drink and often on both sides, so that it bonds to the sidewall in the knurled joint.
Inside the cup forming machine: what does each station do?
A cup forming machine converts a flat fan and a strip of bottom stock into a finished cup in a fixed sequence of stations, typically arranged around one or more rotating turrets carrying the mandrels. Machines are sold in classes by cup size range and speed; typical outputs range from under 100 cups per minute on simple machines to roughly 250-300 or more on high-speed lines, depending on machine, cup size and material. Larger containers and bowls run slower.
| Station | What happens | Critical parameters | What goes wrong if it drifts |
|---|---|---|---|
| 1. Blank feeding | Fans are taken from a magazine, usually by suction cups, and transferred one at a time | Fan flatness, static, dust, magazine pressure | Double feeds, skewed blanks, stoppages |
| 2. Side seam preheating | The seam overlap zones are heated (hot air) or prepared for ultrasonic sealing | Air temperature and volume, nozzle position, timing | Under-heat: weak seam. Over-heat: scorched print, blisters, odour |
| 3. Wrapping on the mandrel | Wrapping arms wrap the fan around a conical mandrel so the ends overlap | Overlap width, fan registration, mandrel condition | Uneven overlap, conical twist, print misaligned to seam |
| 4. Side seam sealing | The overlap is clamped and sealed by hot air plus pressure, or by an ultrasonic horn against an anvil | Temperature or ultrasonic energy, clamp pressure, dwell, cooling | Seam leaks, seam opening under load, raw edge exposed |
| 5. Bottom punching and skirt forming | A disc is punched from the bottom stock reel and its edge drawn down into a skirt, then placed at the narrow end of the mandrel | Punch sharpness, reel tension, disc centring | Off-centre bottom, torn skirt, bottom leaks |
| 6. Bottom heating | Hot air heats the sidewall's lower edge and the bottom skirt | Air temperature, nozzle alignment, timing | Incomplete bond around part of the circumference |
| 7. Bottom folding | The lower edge of the sidewall is folded inward over the skirt, enclosing it | Fold height, coating condition | Wrinkles, channels through the fold |
| 8. Bottom knurling | A knurling (rolling) tool presses sidewall, skirt and fold together under heat and pressure, leaving a textured ring | Knurl pressure, temperature, tool wear | The most common leak point in cups and soup containers |
| 9. Rim pre-curl and curl | The top edge is rolled outward in two or three stages into the rim | Curl tool geometry, board moisture, coat type | Open or cracked curl, flat spots, out-of-round rim, poor lid fit |
| 10. Ejection | The finished cup is blown off the mandrel by compressed air | Air pulse, cup-to-chute alignment | Deformed rims, scuffing |
| 11. Counting and stacking | Cups nest into stacks of a set count for sleeving | Count accuracy, stack straightness | Wrong counts, crushed rims |
| Optional inline inspection | Camera or sensor checks for seam, bottom, rim or print faults; some lines add light-based or air-based leak detection | Detection thresholds, reject handling | False rejects or missed defects |
Why the side seam matters
At the side seam, the inner face of one end of the fan seals to the outer face of the other end. On a 1PE cup, that means the PE inside face bonds into the paper outside face, and the cut edge of the inner flap remains exposed on the inside of the cup. That edge is protected only by the board's internal sizing and by how tightly the seam is pressed, which is why edge-wick resistance is a cupstock property and why hot coffee or soup left for a long time can show a brown stain creeping up the seam. On 2PE board, the seam is a PE-to-PE bond, which is usually stronger. Some liquid-packaging and container constructions fold (hem) or skive the inner edge to cover it; standard drinks cups usually rely on board sizing.
Hot air or ultrasonic sealing?
Hot-air sealing blows air heated to several hundred degrees Celsius at the nozzle onto the seal zone for a fraction of a second, melting the coating surface before the clamp closes. It is simple and works with a wide range of PE board, but heat reaches the print and the board as well as the coating. Ultrasonic sealing uses a horn vibrating at high frequency, commonly around 20 kHz (other frequencies in the 15-35 kHz range are also used), to generate heat by friction at the interface between the layers. Energy goes where the seal is needed, the print is less exposed to heat, and settings can be tightly controlled, which is one reason ultrasonic side seams are common on newer machines and are often preferred for coatings with a narrow sealing window. Bottoms are commonly sealed by hot air and knurling on either type.
Why do dispersion-coated cups need different sealing parameters?
A PE seal works because a relatively thick layer of polymer melts, flows into the opposite surface and solidifies under pressure. A dispersion coating is a much thinner layer with different softening behaviour, so there is less material to flow, a narrower temperature window between "not sealed" and "damaged", and more sensitivity to board moisture and machine timing. Cup makers adapt temperatures, energy, dwell and pressure, sometimes run slower, and validate the result with seam and leak tests.
The physics in more detail:
- Melt volume. PE coat weights on cups are typically in the region of 12-20 g/m²; dispersion layers are usually lighter. The coating must fill the roughness of the opposite board surface and the step where the overlap begins. With less polymer, gaps at that step are a typical leak path.
- Thermal window. LDPE melts at around 105-115 °C and has a broad, forgiving sealing window on cup machines. Dispersion polymers are formulated to seal, but their window between tack and degradation depends on the formulation and is often narrower.
- Moisture. Dispersions are water-based and some are sensitive to board moisture during sealing. Water vapour escaping from hot board can blister any coating; with thin layers the effect on seal integrity is larger.
- Blocking. Some dispersion coatings become tacky at warm temperatures, so fans or reels can stick together in storage or the cups can resist denesting. Storage temperature and stack pressure matter.
- Bottom joint. The bottom joint layers board, skirt and fold. Sealing it through dispersion coatings on both pieces is usually the hardest step to validate and the reason dispersion cups are trialled with the hottest drink and longest hold time the operator uses.
The practical consequence for buyers: a dispersion-coated cup cannot be assumed to perform like a PE cup simply because the board data sheet says "heat-sealable". Ask for leak and seam test results on formed cups from the actual machine, and test with your own drinks. PLA sits between the two: it is extrusion-coated like PE, but its processing window is narrower and its heat resistance lower.
How are double wall and ripple wall cups made?
Double and ripple wall cups start as a normal single wall inner cup, often on lighter board than a single wall equivalent. A separate outer wrap is then printed, cut and glued around it. The wrap is usually uncoated board or paper, so the barrier and the leak performance still come from the inner cup.
Double wall
- The outer wrap is printed (it carries the main design) and die-cut into its own fan, sized to sit below the rim curl of the inner cup.
- On a wrapping machine, or an inline wrapping unit after the forming machine, adhesive is applied in dots, lines or bands, the wrap is wrapped around the inner cup and its own seam is glued.
- Adhesives are typically hot melt or water-based dispersion adhesives. Pattern and quantity are a trade-off: too little and the wrap delaminates or rotates; too much and the air gap that provides insulation is reduced. Adhesives on the outside of the cup still need to suit food-packaging use.
- Some designs create a defined air gap with a shaped wrap or spacers; others rely on the slight gap between the two cones.
Ripple wall
- The wrap material passes through heated embossing or corrugating rolls that form vertical ridges, giving the rippled, fluted surface.
- It is printed before embossing, and the ridges break up fine detail and pale tints; bold, solid designs reproduce best.
- The fluted fan is glued to the inner cup at the ridges, leaving air channels between them.
- Ripple wraps add the most material per cup and nest least tightly, so fewer cups fit in each carton and the same order needs more cartons and pallets.
Typical wrap faults are glue starvation (wrap lifts at the seam or rim), glue squeeze-out on the outside, wrap seam misaligned to the inner seam or the design's front panel, and a wrap set too high, which interferes with the lid. Which construction suits which drink is covered in single vs double vs ripple wall cups. Printed sleeves, the alternative to an insulating wrap, are made differently, usually from single-face corrugated or embossed board; see custom printed cup sleeves and cup carriers.
How are paper food containers, bowls and ice cream cups made?
Paper soup containers, salad and poke bowls, ice cream cups and snack pots are made on the same principle as cups: printed fan, side seam, inserted bottom, rim curl. The differences are diameter, wall angle, board weight and barrier, which usually means larger forming machines or bowl-specific machines, heavier tooling and lower speeds.
| Format | Typical board and barrier | Process points that differ from drinks cups |
|---|---|---|
| Soup containers (8-32 oz) | Heavier sidewall; 2PE common | Bottom seal is tested with hot, thin and oily liquid; rim consistency for vented lids |
| Salad and poke bowls (500-1,300 ml) | Board about 280-350 gsm; 1PE or 2PE | Wide, shallow fan with a short slant height; large bottom disc; bigger forming machine; nesting depends on wall angle |
| Hot food bowls (squat) | 2PE common | Wide diameter and stiff sidewall so the full bowl does not flex at the bottom joint |
| Ice cream cups and tubs | 2PE standard | Outside PE against condensation; denesting and rim consistency for filling lines; print rub after frost |
| Portion and sauce cups | Lighter board; 1PE or 2PE | Small tooling, often high speed; snap-lid fit at small diameters |
Bottom insertion on larger containers
On cups, the bottom disc is punched and inserted as part of the forming sequence. On larger containers and bowls, the bottom disc is bigger and the area of the bottom joint grows with the circumference, so the punch, heating and knurling tools are larger and the temperature profile has to reach evenly around a long joint. Some container designs use a deeper bottom skirt or a reinforced bottom for heavy fills. Two-sided PE is the safer default where the base sits on wet surfaces or condensation, because it protects the board from outside as well as inside.
Ice cream cups and filling lines
Scoop cups for shops behave like small food containers. Take-home tubs filled by an ice cream producer must also run on filling machines: they need to denest cleanly at line speed, carry a rim that accepts lids applied by machine, and stack within case and freezer pallet dimensions. Producers usually run line trials with formed samples before a printed order. Coating and freezer points are covered in paper ice cream cups and tubs, and hot-fill and leak control for soup in paper soup containers.
How are lids for paper cups and containers made?
Lids are made by entirely separate processes, usually by specialist lid manufacturers, and are matched to the cup or container by rim diameter and rim curl profile rather than by capacity.
- Thermoformed plastic lids. PS, PP or PET sheet is extruded, heated and formed over moulds by vacuum or pressure, then trimmed and stacked. PS and PP are common for hot-drink lids; PET and rPET for clear cold lids and salad domes. PP lids are also injection moulded. Under the SUP Directive, beverage cups made of expanded polystyrene, including their lids, have been banned in the EU since 3 July 2021; solid PS lids are not covered by that ban.
- Moulded fibre lids. Pulp is formed on mesh tools and pressed and dried in heated moulds (thermoformed fibre), giving a smoother, more precise lid than conventional moulded pulp. Barrier or sizing additives may be used, so ask for a PFAS statement for these lids.
- Paper lids. PE-coated board is die-cut and pressed with heated tools into a profile that snaps over the rim curl or sits inside it; flat paper lids for ice cream cups are punched and sometimes printed with the flavour.
Lid fit depends on both parts: a perfectly made lid will still pop off a rim that is out of round. Lid materials, venting and compatibility are covered in lids for paper food containers. Film-based plastics processing in general is described in how plastic bags and film are made.
Quality control in cup and container production
Cup quality is controlled at four points: incoming board, printed sheets or reels, the forming machine during the run, and the finished, packed product. Function tests matter most, because a cup that looks perfect can still leak. The general sampling and approval framework (golden samples, AQL, inspection) is in packaging sampling and quality control; the cup-specific checks are below. Test terminology is defined in the testing and quality glossary.
| Check | How it is typically done | When |
|---|---|---|
| Leak test, hot | Cups or containers filled with hot water (for hot products), often with a dye added, stood on absorbent paper for a defined time; seam and base inspected for staining or drops | Start-up, after any adjustment, at set intervals during the run |
| Leak test, coloured liquid | Dyed water or a penetrant solution makes small seam and bottom leaks visible quickly | Start-up and periodic |
| Seam and bottom integrity | Seam torn or peeled by hand or on a tester; a good bond tears fibre across the seal area rather than separating cleanly at the coating | Periodic, per machine |
| Rim roundness and diameter | Go/no-go ring gauges or measurement of rim outer diameter and ovality | Periodic; critical for lid fit |
| Lid fit | Production lids pressed on and removed; filled cup tilted or inverted to check for leaks at the rim | Start-up and periodic; always on new lid-cup combinations |
| Dimensions | Height, top and bottom diameters, brim-full capacity by water weight | Start-up and periodic |
| Stack and denest | Stack height for a set count; cups separated by hand or in a dispenser without sticking or splitting | Per batch; line trials for filling machines |
| Print quality | Colour against approved standard, register to seam, legibility of SUP marking where required, barcode readability | Press start-up and during the run |
| Rub resistance | Rub tester against a defined receptor (ASTM D5264 is a common method), after freezing where relevant | Per batch or per new ink/varnish |
| Odour and taint | Sensory assessment of the batch; EN 1230 type tests where specified | Per batch or per board lot |
| Migration | Tests on finished cups under conditions representing the use (hot fill, contact time), as part of food-contact documentation | Per structure or design change, as the risk assessment requires |
Hot-water leak tests use a temperature and hold time agreed in the specification; for hot drinks cups and soup containers, the time should be at least as long as the real hold time, and preferably include an oily liquid for food containers. Retained samples from each batch, labelled with the production lot, let complaints be investigated later.
Typical defects in paper cups and containers
| Defect | Likely cause | Prevention | How the buyer can detect it |
|---|---|---|---|
| Side seam leak or seep | Insufficient heat or ultrasonic energy, low clamp pressure, contaminated seal zone, ink or varnish in seal area | Validated seal settings, ink-free seal strips, periodic seam tests | Hot dyed-water hold test; look for stains along the seam |
| Bottom leak | Uneven bottom heating, worn knurl tool, off-centre disc, low coat weight on bottom stock | Nozzle alignment, tool maintenance, bottom stock checks | Fill with hot water, stand on paper towel for the hold time |
| Wicking stain at the seam edge | Exposed raw edge on the inside, poor edge-wick resistance, ragged cut from a dull die | Cupstock with suitable sizing, die maintenance, tight seam | Hot coffee or soup left for 30+ minutes; brown line creeping up the seam |
| Blisters or pinholes in coating | Board too moist, excessive heat, coating defects | Board moisture control, temperature limits, coat checks | Small bubbles on the inside; dye penetrates at points |
| Cracked or open rim curl | Board too dry or too stiff, wrong curl tooling, coating cracking | Moisture conditioning, tool set-up per board | Visible cracks or gaps in the rolled rim |
| Out-of-round rim, lid pops off | Uneven curling, cups compressed in packing, humidity during storage | Curl set-up, sleeve and carton design, dry storage | Lid fit test with production lids; ring gauge |
| Print misaligned to seam | Poor print-to-cut register, wrapping offset | Eye-mark registration, wrap set-up | Logo cut by seam, bands not meeting |
| Scorched or discoloured print near the seam | Too much hot air, ink not heat-resistant | Seal settings, heat-resistant inks, ultrasonic sealing | Brown or faded strip along the seam |
| Ink set-off or odour inside cups | Incomplete drying or curing, high pile pressure, unsuitable inks | Low-migration inks, cure checks, pile and reel controls | Faint ghost image inside; smell on opening the sleeve |
| Cups stick together in the stack | Blocking of coating, warm storage, crushed rims, poor taper or stacking shoulder | Storage temperature, packing pressure, tool design | Denest test by hand or in a dispenser |
| Wrinkled bottom fold or crushed bottom | Fold tooling worn, bottom stock too heavy or off-centre | Tool maintenance, correct bottom stock | Visible creases, uneven base, cup rocks on a table |
| Outer wrap lifts or rotates (double/ripple) | Too little adhesive, poor adhesive pattern, glue not set before stacking | Adhesive pattern control, curing time | Twist the wrap by hand; check seam and rim edge |
| Missing or wrong-language SUP marking | Artwork error, wrong plate set | Artwork checklist, plate approval per market | Check every SKU and language version against the order |
Packing, storage and transport
Finished cups are counted into nested stacks and packed into sleeves, then into corrugated cartons on pallets. Packing has a direct effect on quality on arrival: an over-tight sleeve or an overloaded pallet deforms rims, and damp storage softens board and changes rim size.
- Sleeves. Stacks are wrapped in PE film sleeves or paper sleeves, typically from around 20 to 100 cups per sleeve depending on size and the operator's dispensers. Film sleeves keep dust out; paper sleeves reduce plastic in the shipment.
- Cartons. Corrugated cartons hold a set number of sleeves; drinks cups commonly ship several hundred to over a thousand per carton depending on size and wall construction. Double and ripple wall cups, and wide bowls, fit fewer per carton.
- Pallets. Carton size is chosen to suit the pallet footprint (EUR pallets 1,200 x 800 mm in much of Europe, 1,200 x 1,000 mm or US 48 x 40 inch pallets elsewhere) and stacked in a column or interlocked pattern; corners and top boards help protect against crushing.
- Humidity. Board is hygroscopic. Storage in dry conditions, off the floor and away from heat sources, protects stiffness and rim shape. In sea containers, temperature swings can cause condensation ("container rain"), which is why loading dry pallets, using desiccants where appropriate and limiting time in hot yards help.
- Labelling. Each carton usually carries product code, size, quantity and a production lot or date code linking it to the batch records.
Export logistics from Türkiye, including documents and transit, are covered in sourcing packaging from Türkiye.
How the production route drives MOQ, cost and lead time
The process explains most of the commercial terms in a cup or container quotation. Set-up work is per size and per design; running cost is per thousand cups; board and coating supply sets the earliest start date.
- Print set-up. Each design needs plates for each colour and press make-ready time. More colours and more designs mean more set-up cost spread over each run.
- Fan die and layout. Each size needs a cutting die and a layout. Existing sizes reuse tools; a new size needs a new die and dieline.
- Forming change parts. Each size runs on its own set of mandrels, punches and curl tools, and changing them takes machine time. A completely new size or shape can require new change parts with their own manufacturing time, which is far more costly than a new design on an existing size.
- Machine class. Small cups, standard drinks cups and large bowls often run on different machines, so the size mix of an order determines which machines are involved.
- Board and coating. White 1PE and 2PE cupstock is widely available; kraft, PLA and specific dispersion grades may have longer supply times and mill minimums, which feed into MOQ and lead time.
- Secondary operations. Double and ripple wall cups add printing of the wrap, a second cutting step and a wrapping operation.
- Language versions. Each SUP marking language or regional design is a separate plate set and print version, even if the cup size is the same.
Minimum order quantities depend on material, size, print method and run configuration, and final figures are confirmed at quotation. The general logic is explained in what determines MOQ in custom packaging, custom packaging cost drivers and custom packaging lead times.
Food-contact hygiene in cup and container production
Paper cups and containers are food-contact materials, so the factory that makes them is expected to work under good manufacturing practice as set out in Regulation (EC) 2023/2006: a documented quality system, controlled starting materials (board, coatings, inks, adhesives), and production conditions that prevent contamination and the transfer of substances to the food-contact surface.
What that typically looks like on a cup and container line:
- Hygiene zoning around forming and packing, with rules on protective clothing, hair covering, jewellery, food and drink.
- Glass and brittle plastics control, pest control and foreign-body controls near open product.
- Food-grade lubricants where machine parts could touch the product, and cleaning of mandrels, chutes and stackers.
- Closed or covered packing so stacks and sleeves are not exposed to dust.
- Traceability from board reel and ink batch through to carton lot code, plus retained samples.
- Change control: new board, coating, ink or adhesive triggers a review of the food-contact documentation.
Buyers often ask whether a supplier's site is certified to a recognised hygiene scheme. Common schemes for packaging manufacturers include BRCGS Packaging Materials, FSSC 22000 (which builds on ISO 22000 with the packaging prerequisite programme ISO/TS 22002-4) and ISO 22000 itself. These are independent certifications held by individual sites; ask for the certificate, its scope and its expiry date rather than relying on a logo. Wider compliance points are in food-contact packaging compliance.
What to ask a manufacturer about how your cups or containers are made
Use these questions with any supplier; the answers will tell you more about likely performance than a unit price does.
- Board: which cupstock grade and grammage for each size, sidewall and bottom; white, kraft or white-lined kraft
- Barrier: 1PE, 2PE, dispersion or PLA; coat weight per side; who applies the coating
- Documentation: declaration for the board (Regulation (EC) 1935/2004, BfR XXXVI reference), Declaration of Compliance for the plastic layer under Regulation (EU) 10/2011, FDA basis for US supply, PFAS statement for the whole cup
- Print: process (sheet-fed offset, flexo, other), ink system and its low-migration status, varnish, ink-free zones at seam and rim
- Marking: SUP marking language versions required per market, checked at plate stage
- Forming: seal method for the side seam (hot air or ultrasonic) and, for dispersion cups, the seal validation carried out
- Double or ripple wall: wrap material, adhesive type and pattern
- Lids: which lids have been fit-tested with this rim, and lid supplier part numbers
- QC: leak test method, temperature and hold time; seam and rim checks and their frequency; sampling plan; retained samples
- Packing: cups per sleeve, sleeve material, cups per carton, carton dimensions, pallet pattern and height
- Hygiene: GMP system and any certification held by the site, with scope and expiry
The packaging RFQ guide shows how to turn this into a complete request, and how to choose a packaging manufacturer covers supplier evaluation more broadly. Other product families are covered across the How Packaging Is Made series, including how paper bags are made. When your size list, barrier and print route are clear, send the specification to 9 Packaging for technical review and quotation.